equipment

How to Use a Power Pack with Flash Heads

One of the benefits of studio photography is that ability to take advantage of off-camera flash, which provides more power and control than an on-camera flash. There are several different options for off-camera strobe lighting: speedlights, monoblocks, and power pack / flash head combinations.

Packs and flash heads are the most powerful option. Though they are not very portable, they are perfect for studio shoots. At Fairway, we include a Profoto Acute 2R 1200 Power Pack and two Pro 7 Flash Heads with our studio rentals. Here’s what you need to know about using this equipment. 


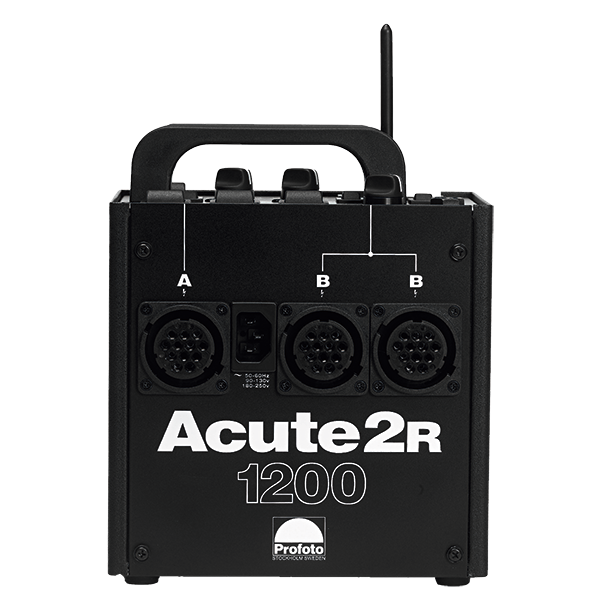
This is a power pack. It's a generator that operates on AC power (so it must be plugged into the wall). The Acute 2R 1200 Pack has a power output of 1200W, and three ports for connecting flash heads (labeled here as "A" and "B"). 


This is a flash head. It should be attached to a light stand and can be outfitted with a softbox, reflector, umbrella or other light modifier — all of which provide different qualities of lighting.

A typical setup we use at Fairway, for example, is a flash head with a large softbox on our righthand side, and a flash head with a medium softbox on the left. The smaller softbox serves as the fill light, meaning it's used to fill in the shadows produced by our main light.

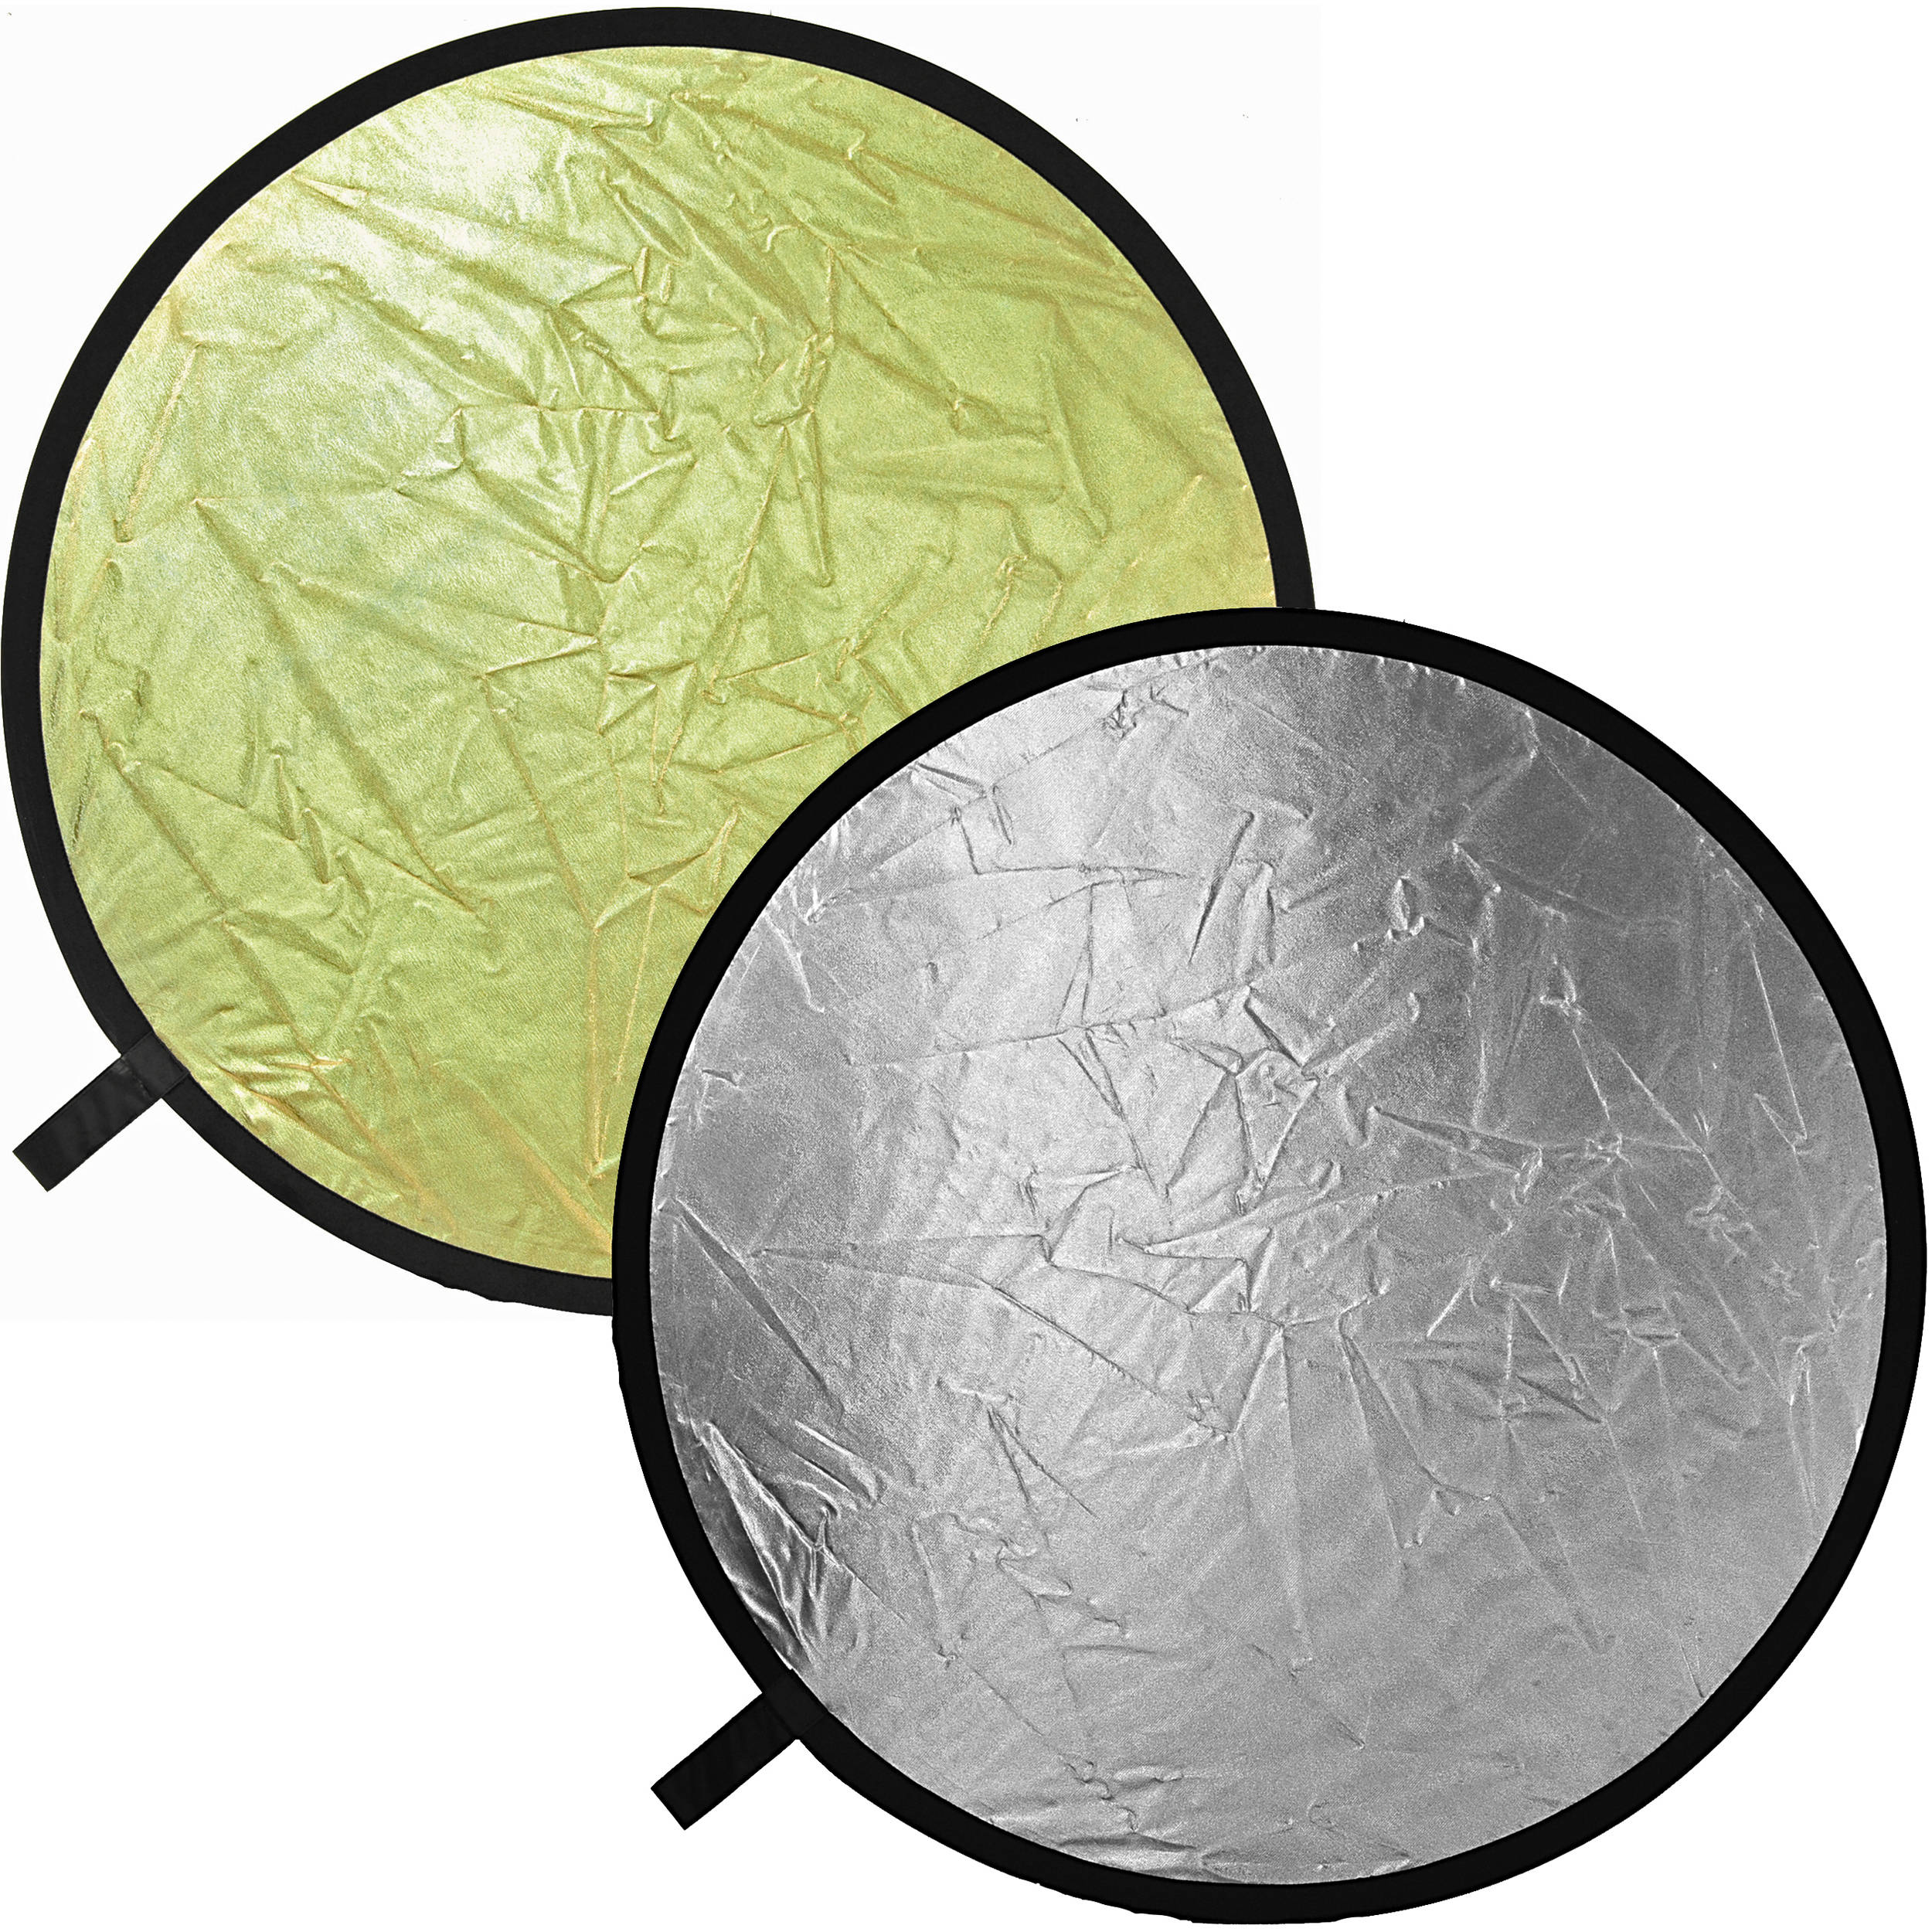
Softboxes produce soft, even lighting. Click to learn more about the different lighting produced by softboxes and umbrellas.


The flash heads do not light continuously; they are controlled wireless by a Pocketwizard Transmitter and Receiver. The Transmitter is attached with a wire to the Power Pack, and the Receiver hooks up to the top of your camera. Make sure they are set to the same channel. When you press the shutter and take your photo, the flash heads will light automatically.


Understanding the Power Pack Controls and Settings:

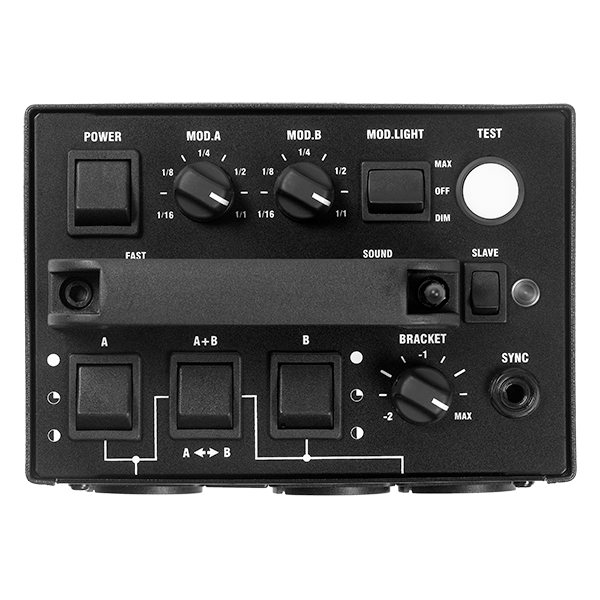
  • MOD.A, MOD.B, MOD.LIGHT — these settings control the "modeling lights." Modeling lights allow you to see where the light will hit. When the modeling lights are on, the strobes will light continuously at a more modest setting.
  • If you want to set off the strobes without taking a photo, press the white TEST button.
  • The strobes will not work unless the TEST button, or "ready lamp", is lit up. It resets every 1/4-second, typically. The more power you use, the slower the recycle time. We recommend turning the SOUND setting on, so the pack will beep when the ready lamp lights up again. 
  • Each light can be set to full power, half power or quarter power. This is controlled using the switches labeled A and B. Remember that the more power you use, the slower the recycle time (it's best not to use more than necessary).
  • You can use symmetrical or asymmetrical power distribution between your lights. To control the power setting of each light individually, select the A+B setting. For symmetrical distribution, select A <--> B.
  • SYNC — This is where you plug in the transmitter cord.

Camera Settings + Lighting

Set your camera to manual mode. You'll need to set your aperture and exposure settings. For studio lighting, you'll typically use an aperture between f8 and f12 and a shutter speed of about 1/200 with your iso at 100-400. If you find that your lighting is too dark or too light, you can either adjust your camera's settings or the power settings of your lights, as well as their placements.

How to Use a Reflector

A reflector is a type of light modifier that is used to bounce (or reflect) existing light. It’s a portable, flexible tool that can dramatically enhance the lighting in your photos. They are easy to manipulate and experiment with.

Most reflectors you’ll see will be a piece of reflective fabric stretched over a flexible ring. However, there are many different types which differ in size, shape, and color.

silver and gold reflectors

CHOOSING A REFLECTOR

For portraits, a small reflector is usually suitable, and it will be easier to handle. Larger reflectors will diffuse light across a larger area, creating a softer light.

Silver reflectors work well for studio lighting. They won’t change the color of the lighting and out of all the reflectors, they will reflect the most amount of light. White reflectors are a bit more subtle, and will typically have to be placed closer to the subject. Gold reflectors will create a warm glow, similar to sunlight.

HOW TO USE YOUR REFLECTOR

A reflector can make a great fill light, which means it can be used to lighten or fill in shadows created by your main light. For example, you can place it on the opposite side of your subject from your main light and use it to bounce light onto dark shadows. You can also place it below your subject to fill in shadows under the nose and eyes.

Using a Beauty Dish

A beauty dish is a type of light modifier popular among portrait and fashion photographers. The metal disc is attached to a light source, and its parabolic shape reflects back into and out the sides of the dish. The result is dramatic lighting that wraps around the subject.

Beauty dishes produce semi-hard light — softer than a strobe but harder than a softbox — with soft edges. They’re popular for portraits because they create contrast and can highlight cheekbones, muscles, and other facial features. Some photographers like to set up the beauty dish to point downwards at the model to accentuate bone structure and highlight the eyes, lips, nose, and chin. 

beauty dish

Rather than diffusing light, as many other modifiers do, beauty dishes reflect light and distribute it towards a focal point. And because the light wraps around the model, there is no “hot spot” in the middle, as there often is with other types of reflectors. To create softer lighting and a dramatic effect, the beauty dish can be covered with a diffuser called a honeycomb grid or sock.

Beauty dishes have a sweet spot where they work best. You’ll want to experiment to see where it best accentuates your subject’s features. Typically, they’re placed close to the model — about 6 inches to 2 feet from their face. To see some examples of setups, check out these links: 

Adorama
Tuts Plus
Expert Photography

Using Strobes for Studio Photography

Strobes are large external flashes that can be specifically placed and angled towards the subject for soft, realistic lighting.

profoto studio strobe light

They provide more flexibility than built-in flashes, which will always go off from the same direction that the lens is pointed, often resulting in harsh shadows and flat, unrealistic lighting. Strobes are generally more powerful than other types of off-camera flashes and are very popular in studio photography. (We include Profoto flash heads with our studio rentals.)

You’ll have your strobe (or light head) attached to a light stand and a type of diffuser, such as a softbox or umbrella. The strobe is plugged into a power source and is triggered by a transmitter, which may be wireless or hooked up directly to the camera. (Fairway uses the wireless PocketWizard Transmitter, which allows you to move freely throughout the studio.)

You’ll want to adjust your camera’s aperture, shutter speed, and ISO settings so that they work well with the additional lighting from the strobe. Start with an aperture setting between f8 and f12, a shutter speed of about 1/200 second, and your ISO set between 100 and 400. In terms of positioning, try placing your light about 6 feet away from the camera. You can start within these guidelines and then experiment to see the different results you get.

How to Use an Umbrella

An umbrella is a type of modifier that diffuses soft lighting. It’s one of the most affordable and versatile types of light modifier. The main difference between umbrellas and softboxes is that while softboxes produce directional lighting, umbrellas create what’s called “inefficient lighting,” meaning it’s spread in many different directions.

umbrella

Using a flash without a modifier such as an umbrella will likely result in hard lighting, which means you’ll get dark shadows. With soft light, shadows are very light or non-existent.

HOW TO USE AN UMBRELLA

A common way to use an umbrella is as a “shoot thru.” The umbrella is placed in front of the flash, and the flash shoots the light through the umbrella and onto the subject. This will create even lighting across the subject. You can also use it as a reflector by pointing the flash at the inside of the umbrella and aiming both away from your subject.

You can experiment with shadows and different lighting effects by moving your umbrella around and placing it at different angles. The “classic” position is 45 degrees up and over to one side. If you’re new to light modifiers, you may want to start here and then try experimenting with new positions. Generally, the larger the umbrella is and the closer it’s placed to the subject, the softer the lighting will be.

Further reading and examples of umbrellas in action: 

Lighting 101: Using Umbrella — Strobist
What Umbrellas Do — Scantips

What is a Softbox?

A softbox is a type of light modifier that’s used to produce soft, even lighting. The lightweight box is made of translucent cloth, wrapped around a wire frame and attached to a light source (usually a studio strobe or speed light) on a stand. 

Profoto Softbox

The interior cloth is white or silver, while the exterior black cloth prevents light from spilling out. The light bounces around and scatters in all directions inside the box, and is then directed outward through a layer of diffusion material. The result is evenly distributed directional lighting that’s easy to control.

The effect is similar to window lighting, and it can help reduce harsh shadows. Softboxes are often used for portraits but are also great for shooting subjects such as products, food, and fashion.

They come in a variety of sizes. The light becomes softer as the size of the box increases and as it’s placed closer to the subject. Soft light can help reduce contrast, soften shadow edges, and conceal imperfections.

You can move the box around — to the side, up or down, closer or further — to experiment with shadows, hardness of lighting, and other effects. If your images look flat, you can try placing the light at an angle. If you’re getting uneven or harsh lighting, try moving the box in front of the subject.

Further reading and examples of softboxes in action: 

10 Different Lighting Effects Using Just One Softbox — Picture Correct
Using a Softbox - studio lighting beginners' guide — ePhoto Zine
5 Tips For Using a Studio Octagon Softbox — Seamless